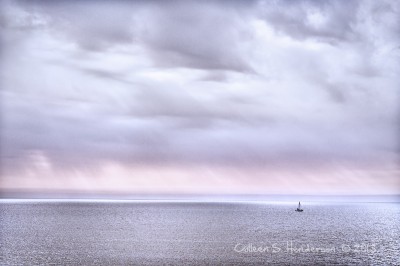
Passion And 10,000 Hours

When student’s comment, “I want to learn how to make my photographs look as good as yours”, my response is always the same, “All it takes is passion and 10,000 hours”.

In Malcolm Gladwell’s 2008 best seller, Outliers, he explains that the secret to success in any field is 10,000 hours of practice.  Not just any practice, but dedicated, intensive, perfect practice.  Think about that for a minute.  Imagine devoting 10,000 hours of your time to your photography.  Chances are, if you did, you would be pleased with the results.

I know of no magic formula for improving your photographic skills other than time and commitment.  And I’m not talking about a little bit of time, here and there, squeezed between other more important priorities.  I’m talking about a dedicated, long term, ongoing commitment to learning the art and craft of photography, the kind of commitment that is not likely sustained unless you share a true passion for photography.

There are many ideas on what you “should do” or “can do” to improve your photographic skills, but for me it really boils down to a few basic concepts:  shoot, edit, print, and repeat.

1) Shoot a lot

There is no way to get good at photography if you don’t make a lot of photographs.  The more you shoot, the more you learn about light and how you see the world, two important aspects of being a good photographer.  A critical byproduct of shooting a lot is becoming intimately familiar with your camera gear so it’s operation is second nature (another critical component of being a good photographer).

2) Edit your successes

Review your results and identify “successes” and “failures”.  Spend time analyzing both.  Looking at your “failures” can often lead to a deeper photographic and personal understanding than limiting your review to only your “successes”.

Post process the images that show the most promise.  The choice of imaging software, (Photoshop vs. Lightroom vs. iOS apps, etc.), is not nearly as important as making a commitment to thoroughly learn whatever software you do use.  Your thought process and choices made during post processing play an enormous role in the final look and feel of your photographs.  Anything less than mastery of the software will severely hamper your ability make the most of your images.

3) Print your best work

There are many ways to share your photographs but I stand firmly in the camp of producing fine art prints.  For me, a photograph is not complete until it has been printed satisfactorily, and once printed, shared with others.  Sharing creative work can be very daunting, even for experienced photographers, but committing to “put your work out for all see” helps ensure that you perform to the very best of your abilities.

4) Repeat

Repeat Steps 1 through 3, for at least 10,000 hours.

The act of shooting will affect the way you see the world, and help you recognize and develop your personal style.  Post processing and printing will influence and improve your visual and aesthetic skills.  Sharing work provides valuable feedback that helps you grow as an artist and photographer.

Of course there are other things you can do to further your photography, (i.e. take classes, study the masters, read, be curious, experiment, make mistakes, challenge yourself, etc.), but never underestimate the value of merely shooting, editing, printing … repeat.

If you are considering any New Year’s resolutions, ask yourself the following: “How many hours did I spend on my photography in 2013?” and “How was the time spent?”.  Adjust for 2014 accordingly.

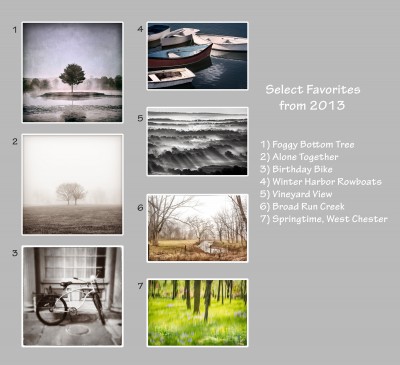
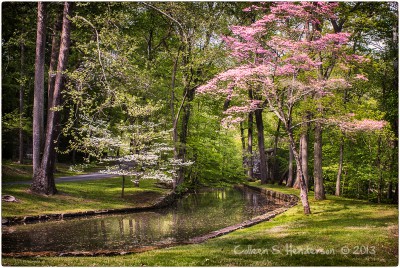
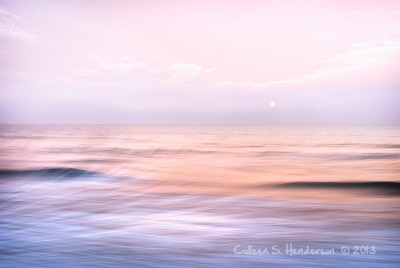
Here are a few favorites from 2013:


If your enjoyed the post, please consider sharing with others. Thanks!

A DAY IN THE LIFE: Artist Statements

I’m often asked what is involved in actually “being a fine art photographer”, and while I suspect it varies for each of us, I think there are similarities we all share.  This is the first in a series of posts that will revolve around A Day in  The Life of a Photographer/Artist.  Periodically I will select and write about a typical task I need to accomplish for either an upcoming fine art exhibition, an on-location photo shoot, a promotional campaign, or perhaps development of a new workshop.  Topics will be culled from issues and tasks I am grappling with at the time.

If there are specific areas you are interested in having me address, please let me know.

Today’s topic: Artist Statements.

According to Wikipedia, “An artist statement is a brief statement of an artist’s intention through their work”.  Seems simple enough right? Then why is it so hard to write an artist statement?  Why do we universally dread it so?  We pour our hearts and souls into creating art that takes us weeks, months, even years to complete.  We put additional effort into displaying the work for all to see.  And yet when it comes to writing a simple artist statement describing the work, we are paralyzed.  We don’t know what to say, how to say it, and perhaps most importantly, why we need to bother.

I’ve been writing, (and teaching others to write), artist statements for years now, and it is always a difficult/abstract topic to address.  But several months ago I had an “aha moment” that helped crystallize a few things for me.  I was in a public space and came across a painting that grabbed my attention.  Enough in fact to make me seriously consider a purchase.  But I hesitated.  Why?  I liked the painting very much.  It was technically well done.  It was of a location that happens to be a favorite of mine.  It was in a painting style I appreciate, with a color palette that appeals to me.  And the price was reasonable.  So why the hesitation?

It took me awhile before I realized it was because I knew nothing about the artist.  Was he local or not?  Was he a beginner or a master?  Does he generally create in this style?  Is this location a frequent inspiration.  Does he often use this same technique or does it vary?  Who is this guy and what is he all about?

Because I have lived in the DC area all my life, and have been a working artist for almost two decades now, I often recognize the names of exhibiting artists, and if I don’t know them personally I usually know something about them.  In this case I knew nothing.  (And there was no easy way to ask for more information without subjecting myself to a high pressure sales pitch.)  I left without the painting.

Thinking back I realize what I was wanted/needed was an artist statement.  I wanted to know a little about the artist, his work, and his source of inspiration, before committing to a purchase.  If he was going to live on my walls for the next 10 years I needed a proper introduction.

A few months later I found myself putting together the finishing touches on a photography project that has been 5 years in the making.  When it came time to write “the dreaded artist statement”, I decide on a “proper introduction” that answered a few basic questions:

  • who I am as an artist
  • what the work is about
  • the source of my inspiration
  • how the work relates to, (or is different from), my earlier work
  • the use of my primary medium (photography)  vs. exploration of new medium (book arts)

The whole process seemed far less abstract, with a more direct purpose.  Here is the final result.  Feedback welcome!

If your enjoyed the post, please consider sharing with others. Thanks!

NORTH POINT MORNING: Before and After

Students often ask me to show “before and after” examples so they can pick up tips and techniques on how they might process their own images.  I’m also frequently asked for advice on converting color images to black and white.  Today’s blog post addresses both questions.

A few weekends back I went for an early morning photo shoot with a fellow photographer.  We were blessed with a quietly beautiful sunrise, followed by dense cloud cover that lasted for several hours.  The overcast clouds allowed for nice long exposures, (on a tripod of course).

We were near the water’s edge  and were able to use the sandy beach, nearby trees, distant spits of land, reflections, docks, partially submerged piers, and various other objects to strengthen our compositions.

En-route from one location to another we stopped for a moment on a sandy beach and made a few images.  When shooting, I’m never quite sure which images will resonate with me until I’m home and I can look at them on the “big screen”.  But as soon as I imported this image and saw the clouds, I knew it had potential.   Below is “North Point Morning“, the original capture, two intermediate edit stages, and the final edited result.


STEP 1: LIGHTROOM (LR): Global adjustment to RAW file

­


Here is the raw capture, straight out of the camera.

I began with my normal processing workflow which consists of global edits via Lightroom.  But before we go there, let’s talk a bit about the overall exposure, and the concept of ETTR.


Expose to the Right (ETTR).

As you can see, the capture is very light, far lighter than the scene looked in person.  And far lighter than I wanted in my final image.  Yet this exposure was intentional.

Many of you are probably already familiar with the concept of “expose to the right”,  but if you aren’t, and you shoot raw, (this does not apply to jpegs), you should become aware of it, and shoot accordingly.  In a nutshell, digital cameras capture significantly more pixel detail in the highlight portion of a file, as compared to the shadow portion of the file.  To capture the most robust digital file, one that will give you the highest quality file after post-processing adjustments, you want to capture images that display a histogram as far to the right as possible, without touching the right edge (if the histogram touches the far right edge your file contains “blown out highlights” which is something you want to avoid).

Granted, your original capture may look nothing like what you intend for your final result, but capturing image data in this way will give you the highest quality file possible for post processing work.

For more on ETTR, refer to Michael Reichmann’s 2003 and 2011 articles

http://www.luminous-landscape.com/tutorials/expose-right.shtmlhttp://www.luminous-landscape.com/tutorials/optimizing_exposure.shtml.

……..now back to LIGHTROOM (LR): Global adjustment to RAW file

Using LR’s Basic Panel I adjusted white balance, highlight, shadow and midtone data to get the image closer to what I ultimately wanted in terms of color balance and tone.  I also used the Detail Panel to address sharpening and noise reduction, the Lens Correction Panel to apply a Lens Profile and remove Chromatic Aberration, and the Detail Panel to add a gentle vignette.

I cropped the image to a square.  (After shooting for year with a Hasselblad, I have  accustomed myself to seeing the world in a square format and often crop to a square during post processing.)

Here is the result of the global LR edits.


STEP2: LIGHTROOM (LR): Convert to B&W

Even when I plan to ultimately convert an image to B&W, I always apply global edits to the color file first.  Only after I have the placed the color tonal values where I want them do I begin thinking about the B&W conversion.

Often I convert to B&W using Nik’s Silver Efex Pro 2 (as a Photoshop plug-in), but in this case I happened to use LR.  (There was no particular reason for choosing LR over Nik, it just happened to be my choice that day.  Both Nik and LR yield very good B&W conversions, as does Photoshop’s B&W adjustment command).  I used the black & white area of Lightroom’s HSL/Color/B&W Panel to convert the image to B&W, and further altered the tones by adjusting a few of the B&W Mix sliders.

Here is the result of the B&W conversion.


STEP 3:  PHOTOSHOP (PS): Local adjustments

Although LR supports some local editing features, I find PS’s local editing tools far more flexible – making my life easier.  Hence, I do the bulk of my local adjustments in PS.

Images converted to B&W almost always benefit from additional Brightness, (and corresponding contrast adjustments), even if tonal adjustments were previously applied to the image.  For this image I wanted to emphasize the light vs. shadow in the clouds, and the corresponding light vs. shadow in the water (this was what initially caught my attention, and for me what the image is all about).  Since our eyes are drawn to brighter areas and higher contrast areas I lightened parts of the water and added contrast to parts of the sky.

Next I wanted to open the shadows in the trees, but only a small amount so as not to steal the thunder from the real stars of the image, the smooth, flat water and the soft, delicate clouds.

With the trees a bit lighter, and therefore a bit more interesting, I decided to add contrast (to draw the eye) along the curve where the water and shore meet.  I used this to direct the viewer’s eye along the left edge of the image, into and beyond the trees, and over to the silhouetted dock and distant spit of land.  At the same time I softened the clouds a bit to reduce the distraction of texture in the lighter areas.

Finally I was beginning to feel satisfied.  I used Nik’s Silver Efex Pro 2 to add a sepia tone and an edge, and then called it a day.

North Point Morning_Final edit


Here is the final result.  I’d love to hear your comments and thoughts.


If your enjoyed the post, please consider sharing with others. Thanks!

Cherish Those “Little League” Moments!

Saturday morning was an absolutely spectacular spring morning.  With nothing pressing on my schedule I decided to spend the morning taking a walk in the park, making a few new “shot of the day” images, and playing some very easy tennis with my husband.  Before heading home, I walked a few circuits around the park.  The air was so clean, fresh and bright, I wanted to extend the time outdoors as much as possible.

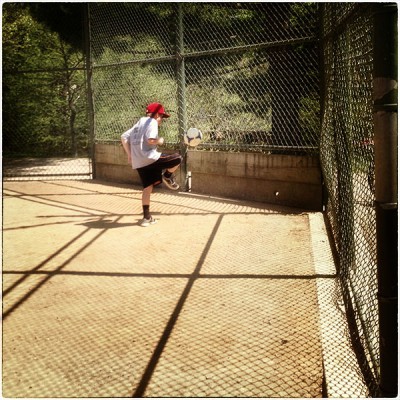
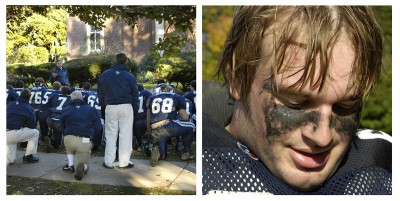
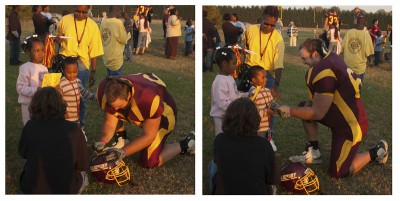
2013_0429_LittleLeague_w4_600x600As I walked, I noticed this young boy outfitted in his DC United soccer shirt, and his bright red Washington Nationals baseball cap.  I watched him idly kicking his soccer ball against the backstop, and immediately thought back to weekends when our son was a similar age.

Saturdays and Sundays were defined by his sports schedule.  Fall was devoted to soccer until it was replaced by football.  Winter was for basketball and ice hockey until they were displaced by wrestling.  Springtime was initially for baseball, but eventually gave way to lacrosse.  So, regardless the year, whatever the season, weekends revolved around practices, games and tournaments.

Thinking back, I remember wishing for just a small amount of personal time on weekends so I could pursue my budding interest in photography.  But it was not to be.  There was never a moment to spare in our busy “sport centric” weekends.

Don’t get me wrong, I loved those times.  Truly.  I loved sitting on the sidelines cheering the team on.  I got to watch the boys develop athletically; witness them form life-long friendships; and observe them as they learned the importance of teamwork and cooperation.  But truth be told, just occasionally, I pined for some “mom time”.

Fast forward twenty years.  As I watched this young ball player wait for his little league game to begin, I reminisced about my over-scheduled weekends from the past, and realized I now pine for the privilege of being one of the parents sitting on the sidelines cheering the team to victory!

So to all the parents of young children who are torn between pursuing your own interests, (photography or otherwise), and the demands of a young family’s busy schedule, here’s my advice:  cherish those “little league” moments;  cherish those high school and college events.  Hold very tight to those once-in-a-lifetime memories.  One day, I promise you, there will be plenty of time on the weekends for you to pursue your own interests.  And if you’re anything like the rest of us, when that time comes you’ll look back and think, that was a darn good way to spend a weekend!

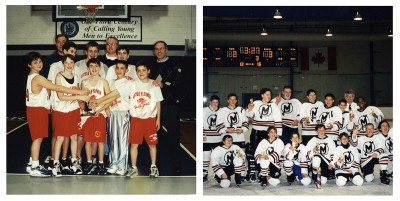
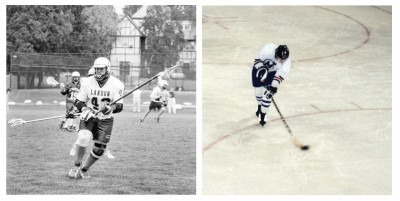
Here are some snapshots from weekends in my past!

20130429_1994_little L_w2_1200max

Soccer & Baseball (1st grade)


20130429_1999_champs_1200

Basketball & Ice Hockey champs (8th grade)


20130429_1999_lax and ice1200

Lacrosse (9th) & Ice Hockey (8th)


20130429_Footbal_HS1200

Football (High School – Senior Day)


20130429_football_college_autographs1200

Football (College – autograph day)


If your enjoyed the post, please consider sharing with others. Thanks!

Celebrate Earth Day!

In celebration of Earth Day, a few landscape images.

VA countryside, yesterday morning.  Incredibly chilly for the 21st of April, but otherwise a spectacular morning shooting with my good “bud” Maureen Minehan.

Fence & Trees, VA Countryside

Fence & Trees, near The Plains, VA

Springtime at the National Arboretum in Washington, DC, (although any season is a good season to visit the Arboretum).

Cherry Tree & Capitol Calumns

Cherry Tree & Capitol Columns

Another favorite Springtime venue, the Brandywine Valley just outside of Wilmington, DE.

Dogwoods in Spring

Dogwoods in Spring

During the summer of 2011 we had crushing heat & humidity in the DC metro area for a full week.  I was out well before sunrise to try and get a few images before the heat sent me scurrying indoors.  This was captured at 6:07am and the heat index was already at 107.  I didn’t last much longer that day!

2013_04_Summer in DC_112 in the shade_Before 6am

Delaplane Barn

I often vacation on the Outer Banks of North Carolina, and many a morning is spent by the shore, with tripod and camera at the ready. This particular morning I spent the better part of an hour shooting with the camera on the tripod. Once the sun was up I decided to make a few handheld shots.  I was drawn to the motion of the waves and instinctively mimicked the movement.  This is a combination of one of the panned shots (lower) with one of the tripod shots, (upper).  I used Photoshop layers and masks to combine the two.

2013_04_NorthCarTide

North Carolina Tides

As often as I can, I accompany my husband on his annual February business trip to Florida, (let’s see, Florida in February….hmmmm… yes or no…not a tough one!). While he is working I have lots of free time to make images.  I was walking the beach just after a powerful afternoon storm was clearing and caught the sailboat amidst the light rays breaking through the clouds.

2013_04_Florida Sailboat after Storm

Setting Sail after Storm (Florida)

And last but not least, at Blackwater one morning, shooting with another very good “bud” Laurie Sand.  We were lucky to be there after a fresh dusting of snow.

Blackwater, First Snow

Blackwater, First Snow

If your enjoyed the post, please consider sharing with others. Thanks!

Social Media: Embrace or Ignore

Late last year I decided that one of my goals for 2013 would be to get better acquainted with social media.  Figure out what it has to offer, how it works, and if/how I might incorporate it into my business strategy.

So far I have learned:
1) It takes a lot of time, many days too much!
2) It present daily challenges: learning, understanding and adopting.  It is definitely not for the faint of heart.
3) In the few short months I have been experimenting with social media, I have discovered a whole new world of very fine, very accomplished photographers, none of which I would have ever come in contact with, were it not for the web or social media.  I enjoy the online community I have begun to embrace, and find it to be an invaluable source of knowledge and feedback on both ideas and images.

So while clearly I am no expert on any of this, I thought it might be useful to share my efforts to date.

BLOG: I started this blog in late 2012 and add to it as time permits (not as often as I’d like). My hope is to add useful content 2-3 times per month on a variety of topics that include field work, technical information, working portfolios, event/exhibition info, and more.

FACEBOOK “business” Page: Periodically I post newly edited images to FB.  These might be recent captures or captures from a few years back.  They may be images from a larger portfolio, or they may be “orphan” images.  They may represent “final images” or “work-in-process images”.  Whatever the case, I find it useful to publish the images and see what, if any, feedback they generate.  Here is a link to my “FB “business” page.  Feedback is useful and very welcome!

EyeEM: I recently started posting photos via EyeEm, an online photo sharing site. EyeEM’s popularity surged after the Instagram debacle in late 2012. My EyeEm posts tend to be more immediate, in-the-field images, that are often shot, edited and posted online, (all within days of capture), without ever leaving my iPhone. Sometimes I’m creating images that are part of my ongoing “daily journal” project.  Other times I’m merely recording my world visually or experimenting and learning about what a new app has to offer. Again, feedback is always useful and most welcome. Here is a link to my EyeEM page.

When I post using the EyeEM app on my iPhone, it allows me to post to other social media sites as well. I can choose to share a photo to not only my EyeEM page, but also to my FACEBOOK pagemy TUMBLR account, my TWITTER feed, and my FLICKR page, all with a single “click”.  (Hopefully EyeEM will soon support immediate posts to Google+ and 500px as well.)  It is easy, simple, and, with little extra effort on my part, I can share my photos across many platforms at once.

So you might be wondering, what is the point?  Why spend all this effort? What are you trying to accomplish? Why post to so many sites?  What are your goals & objectives?  Is it a worthwhile use of your time?  Perhaps even, “Get a life Colleen!”.

Truth be told, I wonder much of the same.  But I’m also convinced this is the future; whether I like it or not; whether I’m on board or not.  Right now my goal is simple: collect information.  Try things out.  See what works, what doesn’t.  See what feels right, what doesn’t.  See what gets traction, what doesn’t.

I’m the first to admit, when it comes to social media I honestly don’t know what I am doing much of the time.  I’m still learning (slowly) how it works, and how it is all interconnected.  Many days I wonder, should I even bother?  And I honestly have no clue if it will ever serve any useful purpose for me.

But here is what I do know:
1) Change is inevitable, (and I’ve never been one to shy from it).
2) The social media trend is obvious, and continues to gain momentum (and ignoring trends has never been a wise business strategy).
3) It is important to me to find new and effective methods for sharing information about my work, my exhibitions, and my classes & workshops, because clearly the traditional methods are no longer viable.

Hence, I find myself at the social media crossroads: embrace or ignore?  I’ve chosen to embrace, (at least for now).

I learn by doing, so I am doing. I’ll share what I learn along the way. I’d love to hear about your experiences as well.

And remember, in the words of the “hockey-great” Wayne Gretzky, “You miss 100 percent of the shots you never take”.

If your enjoyed the post, please consider sharing with others. Thanks!

Three Images, Two Points, One Resolution for 2013

As I think about resolutions for the new year, two points made several years ago by the novelist Ann Patchett resonate with me.

1) The more time committed to what you do, the more output generated.

2) If you practice something each day for the first 32 days of a new year, it will set the course for your entire year.

Patchett took these two simple concepts and resolved to spend one hour a day, every day for the first 32 days of 2009, working on her then un-started novel.  She acknowledges the bar was set very low, but by year-end she had made more progress on her novel than she’d ever dreamed possible.

I’m not a novelist, but I am a photographer, and I often struggle to make time for the things that are most important to me.  So here is my plan for 2013:  I resolve to spend one hour a day, every day for the first 32 days of 2013, working on my personal photography projects. 

So how might I spend this time you ask?

A few obvious ideas come to mind:

  1. Make new images
  2. Organize my LR catalog
  3. Create a slide show (or book) of groups of images
  4. Edit an image a day
  5. Print new images
  6. Work on images for an upcoming exhibit
  7. Work on my new still life series
  8. Work on my daily journal series, (still going strong since 2008)
  9. Take time to understand and use all, (or at least more), of the capabilities available on my camera
  10. Pick five “disappointments” from 2012 (images I expected to be “killer”, but instead were “just so-so”), and analyze why.
  11. Update website with new work
  12. Post regularly on social sites
  13. Find new and inspiring places to photograph

And perhaps a few, not so obvious, ideas:

  1. Take in a museum or gallery show
  2. Read in-depth about a favorite photographer, painter, singer, etc…
  3. Read about the history of photography;  read about art history
  4. Spend time in another art medium (I dabble in watercolors, acrylics and drawing and continue to be amazed at the positive influence  they have on my photography)
  5. Continue the quest to better integrate sound principles of composition and visual design into my images
  6. Scan web for inspiration – both images and/or articles (that’s how I found Patchett article)
  7. Get better acquainted with the creative process.  Devise techniques and exercises to help spark my creative juices
  8. Watch a video and learn something new

I could go on and on, but you get the idea.  What will YOU do for one hour a day, every day for the first 32 days of 2013, to nourish your soul and feed your creative spirit?

In closing, here are three images being considered for the “2012 Favorites” slide show.

Sentinels, Capitol Grounds, Washington, DC

Private Property, No Trespassing, WV

OC Pier Shadows, MD

If you enjoyed this post and would like to subscribe, click the RSS icon     RSS subscribe

Note:  To read the full Ann Patchett article, “Resolved: Writing is a Job”, click here.

If your enjoyed the post, please consider sharing with others. Thanks!

FIELD WORK: Daisy’s Window

It is the day before Christmas Eve, and looking out the window it is pretty clear I won’t be seeing a white Christmas this year.  Thinking about snow takes me back a few years to February 2010 when Snowmageddon visited our area.

With accumulation measured in feet, not inches, there was no chance of going anywhere, not even on foot.  Every few hours I’d walk out onto my covered front porch and watch the snow fall, thinking about all the images I wasn’t able to make.  Day after day the snow crept higher, getting closer and closer to the base of my neighbor’s window sill.  Finally it dawned on me “Colleen, there’s your image”!

Before Snowmageddon I never paid any attention to my neighbor’s window.  Since Snowmageddon, I can’t walk out my front door without a quick glance to the left to see if there is an image waiting to be made.  What started out as a chance photograph on a snowy, winter day has turned into a mini-series on  “Daisy’s window”.  I shoot the window every season now, at different times of the day and under different weather conditions.  Here are a few taken in spring: 

I’ve not yet made another image that rivals the original, but I still take great pleasure creating new images of the window, and I will continue to do so until it no longer calls to me.

Wishing you a peaceful holiday season.  Revel in simple pleasures with friends and family.

Colleen

If your enjoyed the post, please consider sharing with others. Thanks!

FIELD WORK: One Snowy Night in Downtown DC

Washington is home to me.  It’s where I’ve always lived, it’s familiar, full of memories, and what I know best.  I love making photographs in the city.  And for anyone familiar with my photography you know I can’t resist a snowy, nighttime photo shoot downtown.

A favorite memory is of a Sunday in early January, 2003.  It was snowing and blowing all day and by evening there was enough snow to keep most sane people inside, but not enough to keep me from venturing out.

I got downtown about 7pm, just as the snow was stopping.  Temperatures were very mild, the air was still, and the city was eerily quiet.  I wandered the streets for hours, making lots of images, and never getting cold, tired or wet.  The only people I encountered were fellow photographers, and an occasional friendly policeman walking a very deserted beat.  It was a magical evening, a spectacular evening.  Only when I ran out of film (yes, pre-digital), did I reluctantly pack it up and head for home, a little after midnight.

If there were no “keepers” from that evening I would still it count among my favorite DC memories, but as luck would have it I came away some additions to my portfolio as well.

Constitution Gardens

I am often asked about editing black & white images, so here are some thoughts.

When you look at the before and after shots of Constitution Gardens you can see that compositionally the “bones” of the image remain unchanged. As I began my edits, my over-riding goal was to communicate the quiet stillness of the scene.  I also wanted to draw the eye into the snow-laden trees and to have it follow the gentle path made by the benches receding into the distance.

First I lightened some of the midtones (the snow in middle of the image, the snow on the benches, and the areas illuminated by the lamps).  Next I added contrast in the upper third of image, and along the curve formed by the benches.  Finally I added a subtle, dark vignette at the edge to keep the viewer’s eye inside the frame.  I believe the final result helps convey not only what I saw that snowy winter eve, but also what I felt.

Four Trees in Snow, Constitution Gardens

Four Trees in Snow was taken the same evening, only steps from the earlier shot.  With so many lights reflecting off the bright snow it felt more like dusk than the actual time, which was close to midnight.  Again, I was drawn to the tree limbs heavy with snow, but also to the light reflections in the distance.

I started by lightening the whole scene.  Then I darkened the foreground trees to showcase the snow clumps clinging to the vertical trunks.  I increased contrast in the pond to emphasize the lamp reflections, and also increased contrast in the distant tree line to drawn attention to the illumination on the far side of the pond.

This image also holds special meaning for me because it was recently acquired by the Federal Reserve Board in recognition of Vice Chairman Donald Kohn’s retirement after 40 years of service.  As it turns out, Constitution Gardens is only a few blocks from the Board’s headquarters and Mr. Kuhn often enjoyed a lunchtime stroll in this very location.

Closing Comments

First, a strong underlying composition plays a major role when I choose images to edit.   When the underlying structure, (the “bones of the image”), come together in a way that helps tell the story, my editing task is easier and my final results generally more powerful.  As Ansel Adams was fond of saying “There is nothing worse than a sharp image of a fuzzy concept”.

Second, as a photographer I am always in search of inspiration.  Sometimes I choose to visit a new location to drink in all the sights and sounds it has to offer.  But I also have great respect for the familiar, for the ordinary, for places I know and understand more deeply.  Often it is here that I am rewarded with my greatest successes.

Do you have a favorite photo shoot memory?

If your enjoyed the post, please consider sharing with others. Thanks!

EVENT: fotographers at the factory Invitational Exhibit

Timed to coincide with FotoweekDC, a week-long celebration of photography, Multiple Exposures Gallery is hosting the first annual fotographers at the factory Invitational Exhibit.  The exhibit showcases work by photographers associated with the Torpedo Factory Art Center.

We are extremely fortunate to have Brooks Jensen as the juror for the show.  Brooks is a fine art photographer, educator, writer and publisher.  He and his wife Maureen Gallagher founded LensWork magazine, one of today’s most respected and important periodicals in fine art photography.

Please join us for the opening reception on Sunday, November 11, from 2pm – 4pm.

For gallery information and additional show details, please visit our gallery events page.

Click here to see what the TFAA Blog has to say about the show.

Finally, here is my entry that was accepted into the show.

“Bench” was created during the summer of 2012 as part of my Naked Vision class.  Naked Vision is a summer-long class during which participants are expected to shoot and post “a keeper” each day to the class blog.  It can be a demanding, (and at times frustrating), process to shoot every day, and find an image from each day you are happy enough with to share with others.

But for those that embrace the challenge, I consistently hear it is the most rewarding and fulfilling project they have ever done, and it that it teaches them so much about photography, light, composition and more.

In keeping with the spirit of class, I too challenge myself to shoot and post daily.  That way, when things get tough for the class participants, I can relate directly, and provide relevant encouragement.

In the interest of full disclosure, and perhaps education of some sort, here are the two entries I submitted that were not accepted into the exhibit, (also taken this summer during the Naked Vision class).


If your enjoyed the post, please consider sharing with others. Thanks!